
Perfect Chappal Photo Tips for Orthopedic Footwear
Capturing the Essence of Chappal Photography
You’ve seen a chappal photo that makes you instantly click "buy." Photography experts agree: expensive gear won’t teach you how to snap the perfect chapal pic. Captivating results actually rely on three pillars: prep, light, and angle. When the product is orthopedic footwear—chappals designed around biomechanical support—those pillars matter even more, because buyers are scrutinizing contours, underfoot geometry, and construction cues that signal comfort and clinical intent.
Why Your Orthopedic Footwear Photo Starts with a Damp Cloth
Have you ever noticed how a tiny speck of dust looks huge in a picture? Smartphone lenses naturally amplify texture, turning minor smudges into major visual distractions. Before snapping your chappal ki photo, gently wipe the uppers, footbed, and outsole edge with a damp microfiber cloth.
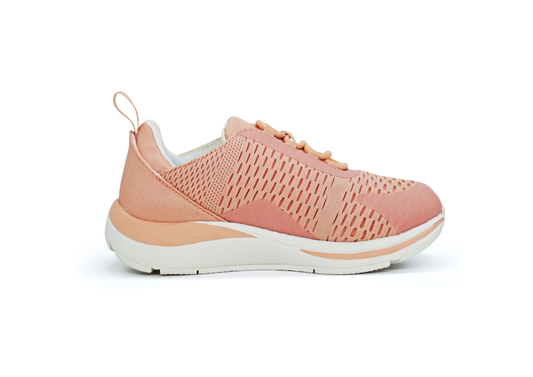
For orthopedic sandals for women, clean the footbed topography carefully—buyers often look for the visibility of arch contouring, metatarsal dome shaping, and heel-cup boundaries. Once spotless, rest the pair on a neutral background—a matte wooden surface or plain fabric—so the product reads as a medical-meets-lifestyle object rather than a cluttered accessory. If you are photographing corrective or comfort-focused Kolhapuri-inspired designs, straighten straps and ensure the footbed is fully visible; twisted straps can obscure medial arch height and misrepresent fit.
Mastering the Sunlight Rule to Reveal Support Geometry
Learning how to photograph orthopedic slippers for online catalogs requires only a window. Position the chappals near the glass but out of direct sun. Think of this window as a giant, soft lamp that reveals subtle height transitions in the arch region while preventing harsh specular hotspots on EVA, PU, or leather-coated footbeds.
For specialized diabetic footwear, light is not just aesthetic—it is diagnostic. You want soft shadows that describe volume without hiding key elements such as a heel cup, raised arch, or rocker profile. If the footbed looks flat in your chappal photo, rotate the pair slightly so the light skims across the arch contour; the resulting gradient communicates support far better than a front-facing shot.
The Clock Face Method: Angles That Sell Orthopedic Value
Instead of pointing your phone straight down, imagine the chappal at the center of a clock and move your camera around it. Use this angle guide to document both style and structure:
-
Top-down: Shows the full footbed map—arch contour, toe ridge, metatarsal pad placement, and lining texture.
-
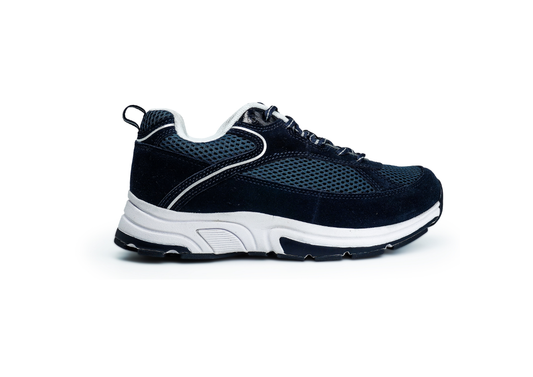
45-degree: Captures overall form while keeping the footbed readable; this is often the "hero angle" for orthopedic shoes for men.
-
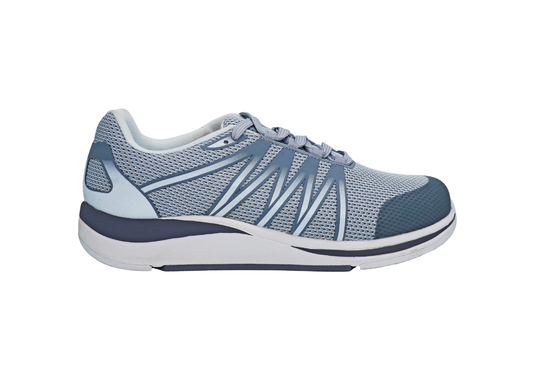
Pure side-view: Displays sole thickness, heel-to-toe drop, and rocker curvature.
That side-view is especially crucial for those shopping for plantar fasciitis shoes. A clean profile shot makes it easier to compare heel elevation, outsole flare, and midsole stack height without guessing.
Close-Ups That Build Clinical Credibility
One compelling chappal ke photo is rarely enough for orthopedic footwear. Add targeted close-ups that answer silent questions:
-
Arch Close-up: Show contour continuity and surface finish.
-
Heel Cup Close-up: Photograph the rear footbed boundary so depth is obvious, essential for heel pain shoes.
-
Outsole Tread: Demonstrate anti-slip patterning and material density.
-
Strap Construction: Highlight padding and adjustability in products like a men's orthopedic sandal.
If you sell orthotic-friendly designs with removable insoles, include a shot of the insole partially lifted to communicate modularity without over-explaining it.
The Salt and Pepper Approach to One-Tap Editing
Editing every chapal pic benefits from the "Salt and Pepper" approach. Add a pinch of brightness for a clean, clinical feel, then increase contrast slightly to define footbed relief and outsole edges. Avoid heavy filters; color accuracy is essential when customers are judging material type or whether the footbed looks plush versus firm. This is particularly important for therapeutic shoes where material integrity is a selling point.
Your 30-Second Action Plan for Better Orthopedic Chappal Photos
Execute the Clean-Light-Angle workflow in under a minute:
-
Wipe: Remove dust and smudges.
-
Window-light: Use soft, natural light.
-
Shoot: Capture a top-down and a side profile.
If you do only one extra thing, add a close-up of the arch and heel cup. Clear, geometry-forward photography is the fastest way to convert comfort-seeking browsers into confident buyers.
Q&A: Orthopedic Footwear Photography
Q: What should an orthopedic chappal photo prove at a glance?
A: That the footbed has intentional structure—visible arch contour, a defined heel cup, and a stable sole profile—not merely decorative cushioning.
Q: Which angle best shows arch support?
A: A 45-degree hero shot with soft window light skimming across the footbed; it creates a gradient that makes the arch height readable.
Q: Should I include lifestyle shots?
A: Yes. While technical shots justify the medical value, seeing women's orthopedic shoes in a lifestyle setting helps the customer visualize them in their daily routine.
Q: What editing mistakes undermine trust?
A: Over-smoothing textures and aggressive color shifts. These make the product look less structured and can mislead customers regarding the actual support provided.
